
I had to think long and hard about posting about this figure because, while Perfect Effect's Leonidas is undoubtedly the most disastrous purchase I've made in all my years of collecting, Binaltech Black Convoy comes a very close second. Made available at the winter 2007 Wonder Festival in Tokyo for the very reasonable price of ¥6,500 (a mere £42 in today's money), I acquired this on eBay at some point after the event. Once out of its packaging (a bubble pack, much like contemporary Alternators toys, rather than the traditional Binaltech box), it quickly became apparent that I'd bought a bit of a lemon: one of the joints connecting the bonnet to the car had been subject to a glue spillage and was immobile at an awkward midpoint, useful neither for robot mode nor vehicle mode.
At the time, it felt kind of like the universe's response to my avarice, considering I'd already acquired the Alternators versions of both Optimus and Nemesis Prime, and this figure basically went straight back into its packaging. There it remained until a few months ago, when it fell off the shelf it was on. Naturally, since the packaging was open, the figure slipped out on the way down, leading to one of the wing mirrors breaking off.
Since the box is clearly no longer a safe storage place, and I've been debating what to do about the wing mirror (temporarily on hold, having discovered that every tube of superglue I own has dried up), he's been sat on one of my main display shelves just to keep him reasonably safe and out of the way... Earlier in the week, I had to do a bit of hoovering, and so cleared the space in front of that cabinet, I figured I might as well pull him out and snap a few photos...
Normally, the first thing that would be apparent on a figure like this is the lush, glossy black paint job, and how much better it looks that the bare plastic of the Alternators version... Unfortunately, the glued joint on this one means the most apparent thing is that the bonnet won't close.
Or open.
Additionally, while working on this post, I realised that the left side door won't close properly because the plastic inner part is bent, possibly as a result of the same fall that broke the wing mirror on that door, but I honestly can't remember if it worked properly when I first bought it.
That out of the way, it's still possible to appreciate the amazing glossy paint job, but it's far easier to pick up on its flaws. There's a scuff of some kind just above the front right wheel well, the edges of the bonnet are scuffed in multiple places, the doors never seem to close properly, and the front bumper doesn't stay together. The steering feature works, but the framework it's mounted in likes to compress itself toward its robot mode configuration - it's not loose, as such, it's just that it doesn't click into place in either form, so the slider joints get nudged as the wheels are moved.
On the upside, the hubcaps are chromed, rather than just painted silver (though, strangely, the exhaust pipes are still only painted silver), and the disc brakes are painted in behind them, where the Alternators version left them as bare grey plastic. All the branding decals are crisply painted, and the white 'Viper' labelling on either side of the scoop in the bonnet even feature their red underline, where it was single-colour on both of the Alternators figures. The number plate on this one reads 'BLACK-CONVOY' rather than 'NEMESIS', per the Alternators figure, and has no US State labelling. The lettering of 'CONVOY' is excessively compressed, and yet still overspills the white backing on the letter 'Y'.
Aside from the fact that the windows are clear, colourless plastic rather than translucent red/pink, this version features the indicator lights mounted on the back of the cab, which the Alternators version didn't because... there would have been no way to differentiate between it and the rear windscreen. It's not as if there's any sculpted light detail, though, it's literally just an area of translucent plastic with a red tint applied. On the subject of indicators, the rear lights on this one, unlike the Alternators version, are painted as if framed in red - like the real-life vehicle - rather than silver. I'd have to say the rear lights on the Alternators look better to me, because the individual lights seem to get lost on this version. It's not helped by the fact that the indicator lights - while appropriately orange at the front - are overpainted with the same block of overly opaque red paint as the rest of the light block, and only the reverse lights are uncovered. Another downside to this version is the bumper hinges inside the front wheel wells are molded in a dark teal plastic for no obvious reason, and stick out like a sore thumb in vehicle mode.
Given that so much of the vehicle shell is die cast metal Black Convoy is incredibly heavy - almost 700g (approx 1.6lb) versus 320g (0.7lb) for the Alternators version, more than twice as heavy. Given the loose joints on both of the Alternators figures, this doesn't bode well for Black Convoy's robot mode...


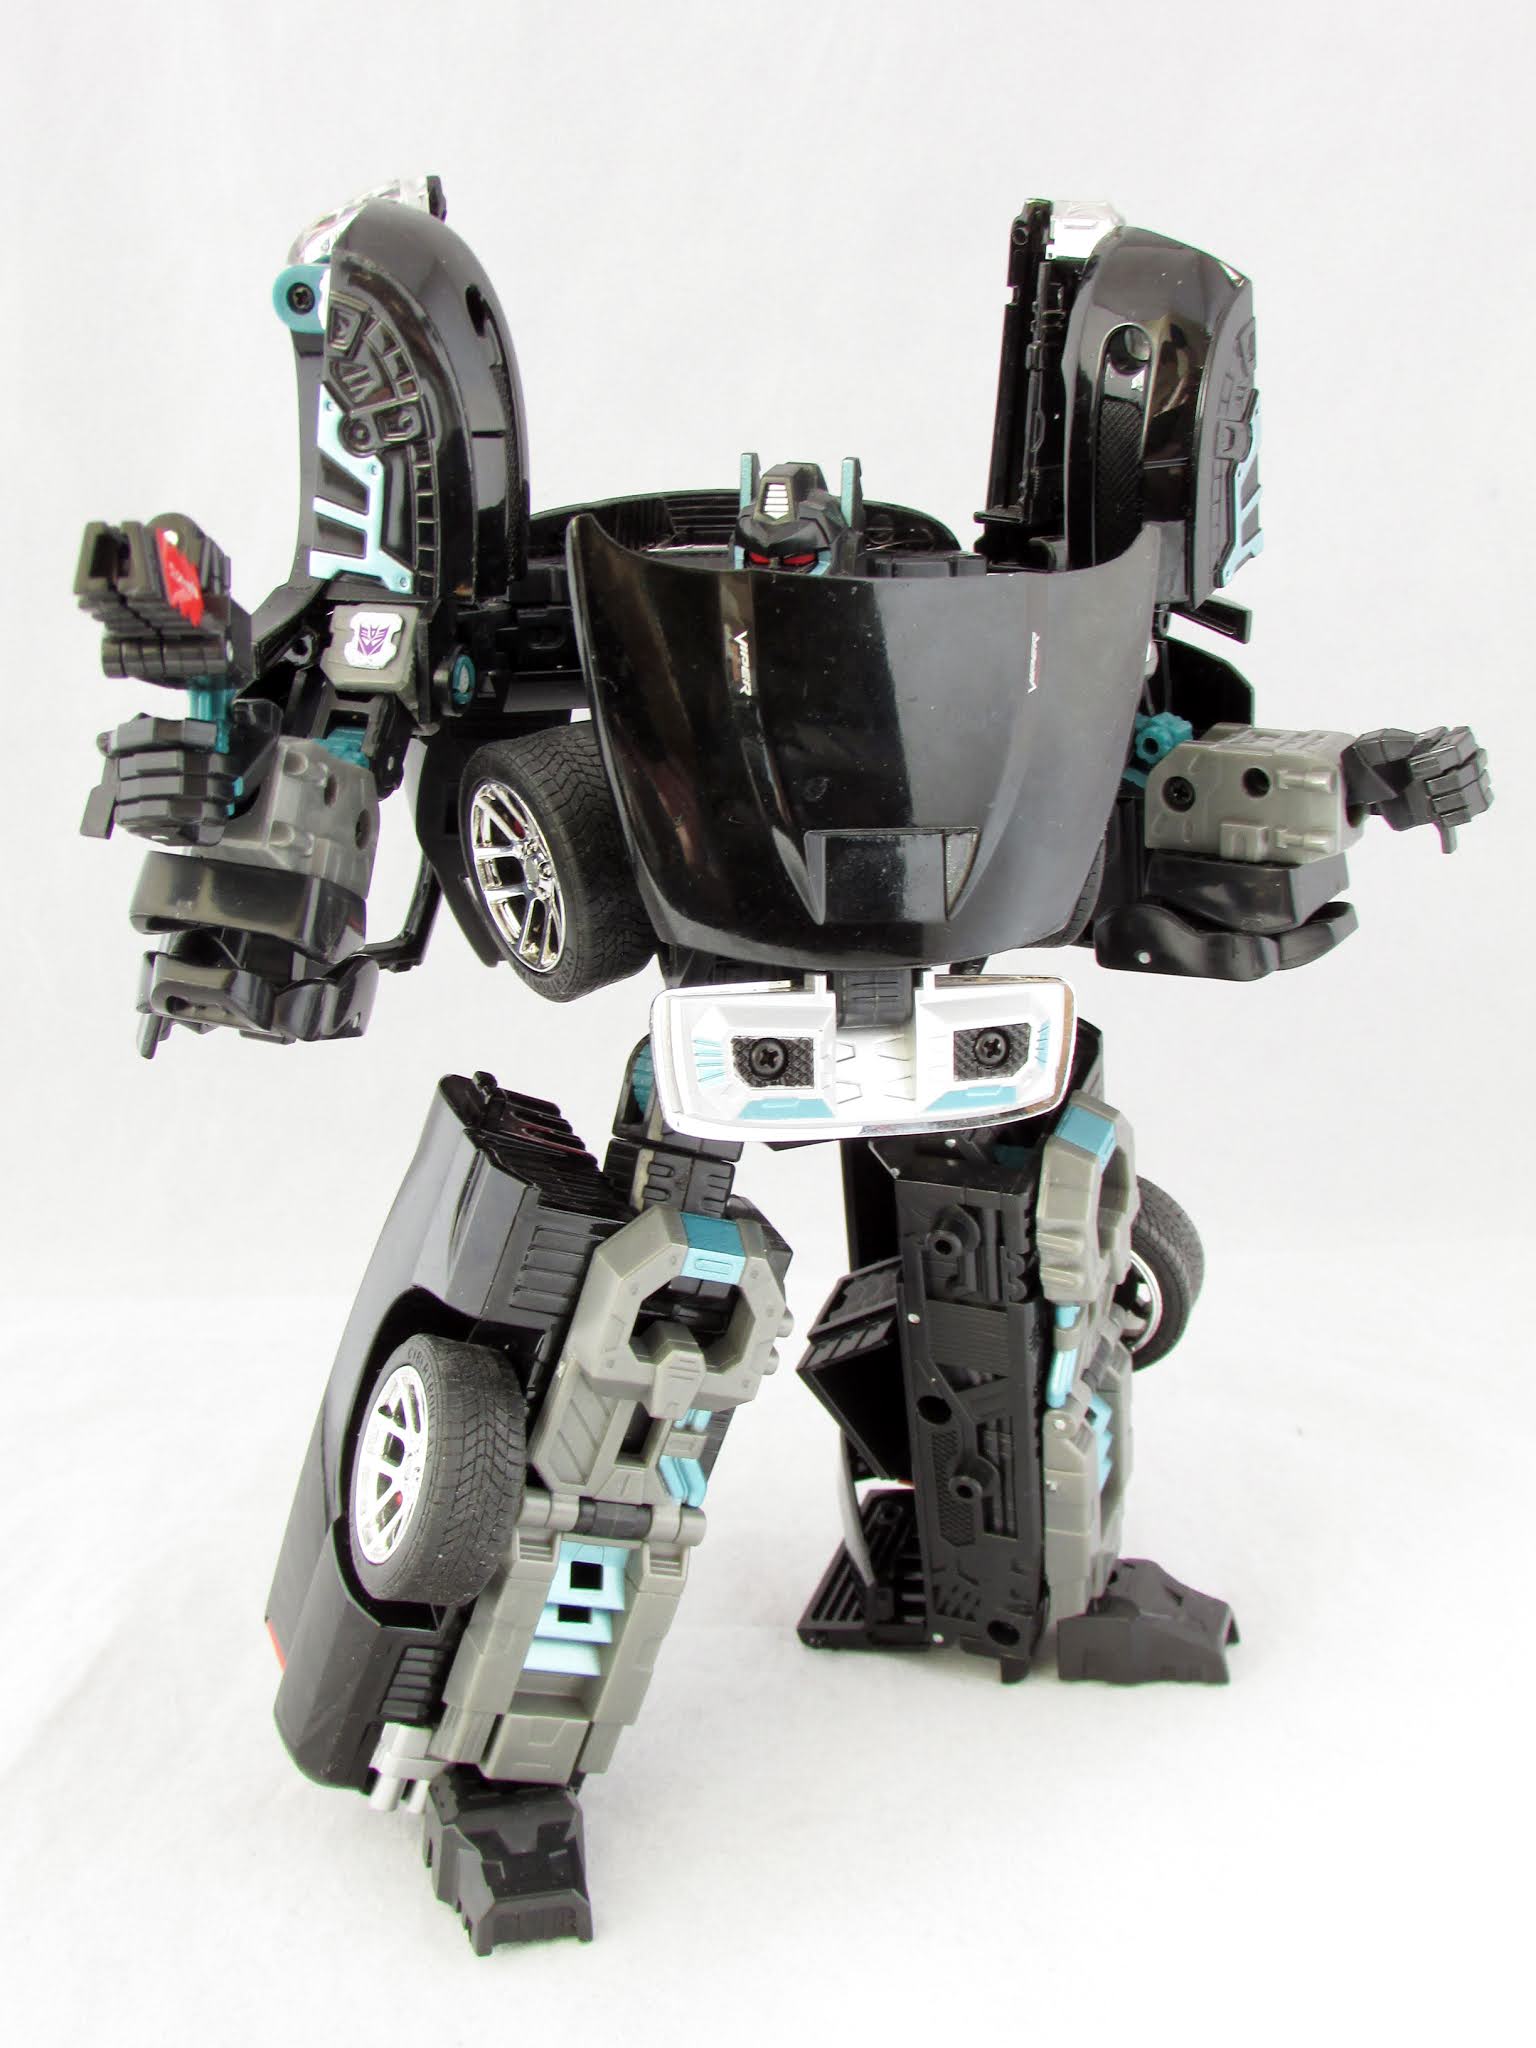
Robot Mode:
And, surprise, surprise, Black Convoy is a floppy mess in robot mode. That sheer quantity of die cast metal in the upper body vastly outweighs the ability of the hips and knees to support it. Similarly, there are no stopping points on either hinge facilitating the transformation of his shoulders, so the front wings, doors and bumper swing quite freely under their own weight, while the robot's shoulder and elbow joints themselves are, contrarily, surprisingly tight and awkward to move. The doors' hinges have been 'improved' over the Alternators version in that there's a metal pin driven through the front wing section, but then the plastic inner part of the door is still just clipped onto it... and it's incredibly floppy due to the weight of the die cast outer panel.
While the vehicle shell is all a lovely glossy black - with some metallic teal on the parts of the bumper folded down on his shoulders - this version departs from the traditional Nemesis Prime/Black Convoy/Scourge colourscheme by using grey plastic for the shoulder blocks, forearms and shins, while the elbows, hip joints and knees use the incongruous dark teal plastic. Where the Alternators version had surprisingly extensive paintwork on the forearms, shins and feet, but left the crotch plate bare, this version just has its Decepticon insignias on white background panels on the shoulders, a few touches of metallic teal on the shins - rather more sensibly highlighting the cables just below the knee and the traditional lower-shin vents - along with a full coating of silver on the crotch plate with touches of metallic teal around its black-painted grille panels.
Even the weapon gets a better paint job, with the sides of the barrel painted red and the Viper logo picked out in silver, but then it's lumbered with more of the dark deal plastic for the grip. If it weren't for that odd choice, this version would be a massive improvement over the Alternators one... though I can't help but think it would have looked even better with some metallic paint over the pipework details on the main body... and the length of the grip is still a little excessive, since the trigger is in line with his thumb rather than any of his fingers, and the peg for attaching the gun to his palm is right at the bottom of the grip.
The head sculpt is, naturally, the same as on the two Alternators toys, but the paint job is very different, with teal stripes down the fronts of his antennae and the cheek guards. The battlemask and central crest details are both painted silver, but the paintwork over the former is not as extensive. Where the Alternators version has paint on the sliver of nose and cheek above the level of the mask, this version leaves all that as bare black plastic, though the eyes seem to be painted a more vivid red, which helps them stand out better. By the looks of things, this paint pattern is based on Car Robots Black Convoy/RiD Scourge, but it doesn't quite suit this sculpt. Overall, I don't think this version is an improvement over the Alternators paint job, though it's still one of the more striking Optimus/Nemesis Prime head sculpts.


Looking back, I feel that this is almost a result of my hubris when I first got back into collecting with the aid of my large disposable income at the time: as mentioned, I already owned Alternators Optimus Prime and Nemesis Prime - neither of which were commonly available in the UK, and the latter having initially been an SDCC exclusive in 2006 - but it wasn't enough. I coveted the Binaltech version for my collection... I think I paid about £120-ish for this, but got a small (10%?) refund from the eBay seller when I reported the issues caused by the spilled glue. While I was grateful for some money back, that wasn't really the point. I'd wanted the 'perfect' version of the figure, and this was anything but. The die cast metal content exacerbated all the loose joint issues it shares with the Alternators toys, the glossy black paint job was very prone to chipping and there are aspects of the figure - the random use of dark teal plastic and the weird choices in the head's paint job - that outweigh the minor improvements like the painted brake pads and more accurate engine/gun paintwork.
Plus, this just wasn't a particularly great mold to begin with. It's pretty wasteful of its vehicle mode volume - the area under the bonnet is largely empty and the thighs could easily have been made longer considering the length of the truck bed - and the way the front wings and doors bulk out the shoulders, while the roof and rear of the cab end up hanging off his back like a bulky cape prove that it wasn't Binaltech/Alternators' finest hour by a long shot.
Now, it's worth mentioning that I took another crack at cutting through the glue after taking these photos, and had some degree of success. I can now get the bonnet folded fully down on his chest (and, in fact, it looks as though the hinge on the other side stops higher up now), but not back/down flush with the windscreen section and the front bumper in vehicle mode. Since I have the Alternators version, I may end up doing a few parts-swaps, starting with the plastic inner door panel on the left side, so the door can close again, and then - if I can figure out how to do it - switch out the broken wing mirror as well. Since both are glued into their respective slots, there's a good chance that attempting to remove the whole one will destroy the plastic door it's mounted in, and removing the broken one will wreck the paintwork, so I might be better off just gluing the broken one back together.
No comments:
Post a Comment